


Ragnarok World
How to Level Up
The way from Level 1 to 99 on PronteraFree for a new player: you have no cards and no special gear yet, only the free Level-Up Pack items. Find your class in the route table, go to the spot for your level, and move on when the next range starts. Every spot was checked against the server's real monsters, spawns and EXP rate (Base EXP ×1.5).
What you start with
Your first job change gives you Level-Up Pack (1) (once per account). Equip these right away:
| Your class | Weapon to use | Why |
|---|---|---|
 Swordman | Metal Two-Handed Sword (ATK 160) | Full damage on large monsters like Peco Pecos and Savages. |
 Thief | Metal Dagger (ATK 118) | Fast hits, and Double Attack works with daggers. Best on small monsters. |
 Merchant | Metal Two-Handed Axe (ATK 185) | The strongest pack weapon. Slow, so pick monsters that don't attack first. |
 Acolyte | Metal Mace (ATK 130) | Full damage on medium and large monsters. Heal hurts Undead. |
 Archer | Metal Bow (ATK 100) + arrows | Packs 1 to 60 each include Quivers (arrows). Shoot while walking back and most monsters never reach you. |
 Mage | Metal Staff (MATK +105, INT +3) | Doubles a new Mage's magic damage. Mages level the fastest early on. |
 Beginner Hat
 Beginner Armor
 Beginner Garment
 Beginner Shoes
Free helpers
147, 170 and in most towns, but not in Niflheim, Jawaii, Nameless Island, Thor Camp, Manuk, Splendide, Dewata or Brasilis.149, 187, Payon, Geffen, Morroc, Alberta, Izlude, Aldebaran, Yuno and more. None in Einbroch, Lighthalzen, Hugel, Rachel, Veins or Moscovia.147, 164). What's inside.What to bring
 Novice Potions from your packs
 Red Potions buy at any Tool Dealer
 Orange Potions Pack 40
 Yellow Potions Pack 50+
 Novice Fly Wings find monsters fast
 Novice Butterfly Wings back to your save point
 Quivers Archers
Your route by class
Pick your class and follow the row from left to right. Tap a spot name to see its monsters and how to get there. The ranges are for a solo player with pack gear only: with good cards or a party you can move up sooner.
The spots
Each card shows the map, its monsters (level, HP, element and what they are weak to), how to get there with the free Warper, and which classes do best. Monsters marked attacks first will chase you.
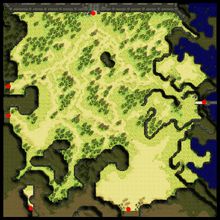
prt_fild08Prontera Field 8


Getting there: Free Warper: Fields → Prontera Fields → Prontera Field 8 (or walk out of Prontera's south gate).
Your first hunting ground after the Training Grounds. Hit Porings and Lunatics until Job Level 10.
Before you change job, spend every skill point: the Job Changer (Prontera 147, 167) refuses you if any are left.
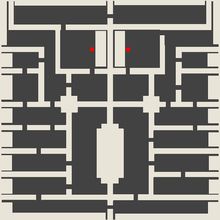
prt_sewb1Prontera Culvert 1


Getting there: Free Warper: Dungeons → Culverts → Culverts - Lvl 1.
Your first stop after the job change. Thief Bug Eggs don't fight back and the rest hit softly.
Familiars attack first but die in a few hits.
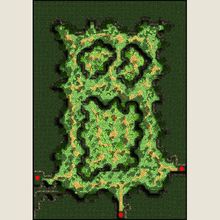
pay_fild08Payon Forest 8


Getting there: Free Warper: Fields → Payon Forests → Payon Forest 8.
Spores give a lot of Job EXP for their level: good for reaching Job 40 sooner.
Archers shoot them from range and barely get touched.
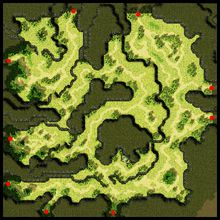
prt_fild07Prontera Field 7 (Rockers)


Getting there: Free Warper: Fields → Prontera Fields → Prontera Field 7.
Rockers are slow, weak and everywhere. A safe, steady spot for every class.
Watch out: the single Vocal (3,016 HP) attacks first and hits much harder than a Rocker. Walk away from it until you are about Lv 25.
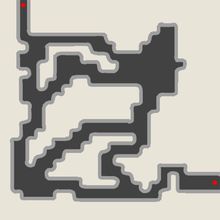
pay_dun00Payon Dungeon 1


Getting there: Free Warper: Dungeons → Payon Dungeon → Payon Dungeon - Lvl 1.
Skeletons and Zombies are Undead: an Acolyte's Heal damages them, and Mages can use Fire Bolt.
Watch out: Zombies and Familiars attack first. Don't pull more than two at a time.
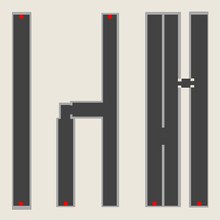
prt_sewb2Prontera Culvert 2


Getting there: Free Warper: Dungeons → Culverts → Culverts - Lvl 2.
A small map packed with 220 monsters, so you spend your time fighting, not walking.
Most of them don't attack first. You can stay here a long time.
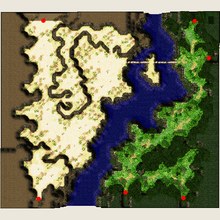
moc_fild02Sograt Desert 2 (Peco Pecos)


Getting there: Free Warper: Fields → Sograt Deserts → Sograt Desert 2.
Peco Pecos give good EXP and don't attack first.
They are large monsters, so Two-Handed Swords and Two-Handed Axes do full damage.
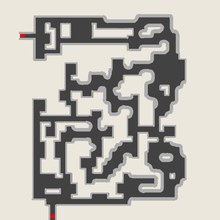
mjo_dun01Coal Mines 1

Getting there: Free Warper: Dungeons → Coal Mines → Coal Mines - Lvl 1.
Lots of small, low-defense monsters: great for a Thief's fast dagger hits and Double Attack.
Watch out: Familiars attack first and come in groups.
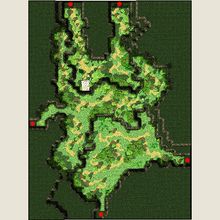
pay_fild02Payon Forest 2 (Wolves)


Getting there: Free Warper: Fields → Payon Forests → Payon Forest 2.
The best all-round spot on the server for pack gear. Wolves give 329 × 1.5 Base EXP each.
Archers and Mages: come from Lv 15. Mages use Fire Bolt (Wolves are Earth), Archers shoot while backing away.
Melee classes: wait until about Lv 30. Wolves hit in packs and a fresh Swordman or Merchant runs out of HP fast.
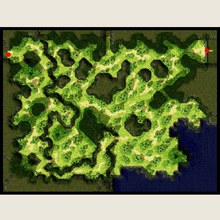
prt_fild03Prontera Field 3 (Yoyos)


Getting there: Free Warper: Fields → Prontera Fields → Prontera Field 3.
Yoyos and Smokies are Earth and don't attack first. Close to Prontera for selling and healing.
Watch out: one Choco (Lv 43) roams here and attacks first.
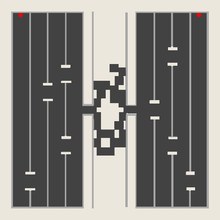
prt_sewb3Prontera Culvert 3


Getting there: Free Warper: Dungeons → Culverts → Culverts - Lvl 3.
Thief Bug Males give 223 × 1.5 Base EXP for only 583 HP.
Watch out: Thief Bug Males and Poison Spores attack first. Fight near a wall so only one or two reach you.
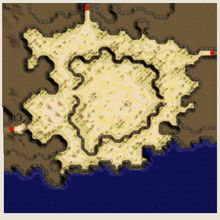
moc_fild18Sograt Desert 18 (Mukas)


Getting there: Free Warper: Fields → Sograt Deserts → Sograt Desert 18.
Mukas give 273 × 1.5 Base EXP for 610 HP and don't fight back much: huge EXP once you can stay safe here.
Mages can come from Lv 45 with Fire Bolt.
Watch out: Steel Chonchons dodge most hits from low-level characters, and one Hunter Fly (Lv 42) attacks first and hits very hard. Leave the map with a Fly Wing when you see it.
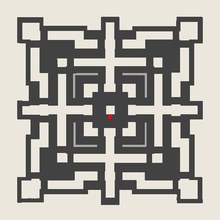
prt_sewb4Prontera Culvert 4


Getting there: Free Warper: Dungeons → Culverts → Culverts - Lvl 4.
The Culverts' best floor: Thief Bug Males and Drainliars in a small map.
Watch out: Cramps (Lv 56) attack first, and the Golden Thief Bug boss lives here. Fly away from both.
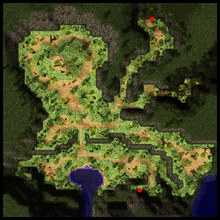
mosk_dun01Les Forest (Moscovia)


Getting there: Free Warper: Dungeons → Moscovia Dungeons → Les Forest.
The Mage spot. Wood Goblins and Les are Earth: Fire Bolt does 150% or more. Wood Goblins give 2,201 × 1.5 Base EXP.
Melee classes and Archers can join from about Lv 75.
Watch out: there is no free Healer in Moscovia, so bring potions.
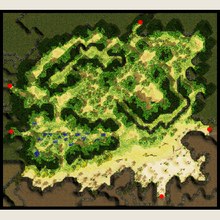
prt_fild10Prontera Field 10 (Savages)


Getting there: Free Warper: Fields → Prontera Fields → Prontera Field 10.
Savages give 521 × 1.5 Base EXP, hit softly for their level and never attack first.
A calm spot for second jobs whose Beginner set has stopped working.
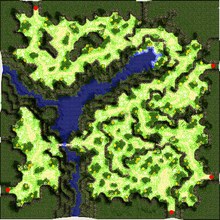
gef_fild03Geffen Field 3 (Orcs)


Getting there: Free Warper: Fields → Geffen Fields → Geffen Field 3.
Orc Warriors and Savages, all Earth. Mages can start here at Lv 40 with Fire Bolt.
Watch out: Orc Warriors attack first, and one High Orc (Lv 52) roams the map.
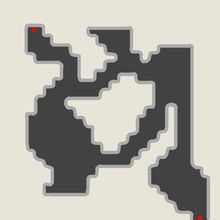
orcsdun01Orc Dungeon 1


Getting there: Free Warper: Dungeons → Orc Dungeon → Orc Dungeon - Lvl 1.
Orc Zombies come in big groups. Archers kite them easily. In a party, Acolytes and Priests can come much earlier.
Watch out: almost everything attacks first. Don't come here alone as a melee class before about Lv 60.
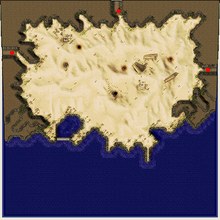
moc_fild17Sograt Desert 17 (Hodes)


Getting there: Free Warper: Fields → Sograt Deserts → Sograt Desert 17.
Hodes give 550 × 1.5 Base EXP and don't attack first. Mages can come from Lv 45.
Watch out: Frilldoras and Scorpions attack first, and the Phreeoni MVP spawns on this map. Fly away when you see it.
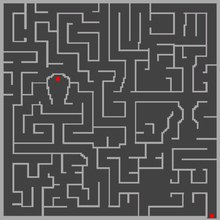
in_sphinx1Sphinx 1 and 2


Getting there: Free Warper: Dungeons → Sphinx → Sphinx - Lvl 1 (or Lvl 2).
Requiems, Zeroms and Matyrs: steady EXP for strong melee and Archers. Floor 2 has more monsters than floor 1.
Acolytes and Merchants should wait until about Lv 85 or bring a party.
Watch out: every monster here attacks first. Keep a Butterfly Wing ready.
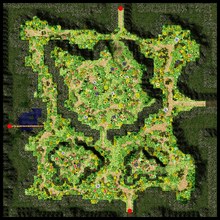
mjolnir_05Mjolnir Field 5


Getting there: Free Warper: Fields → Mjolnir Fields → Mjolnir Field 5.
Argiopes give 1,797 × 1.5 Base EXP. A busy map for strong second jobs.
Watch out: everything here attacks first and Argiopes and Argos poison you. Carry Green Potions.
Digimon World
The Digital World has its own hunting grounds: digital copies of the RO maps (dprt_fild08 is Digital Prontera Field 8) plus its own regions. Any class can hunt there, and a Digimon Master levels nowhere else. Digimon use the same Pre-Renewal levels, HP and EXP as RO monsters, so pick a map whose level is close to yours.
| Your level | Good Digimon maps |
|---|---|
| Lv 1 - 10 | Digital Prontera Field 8 · Yokohama Village · Digital Prontera Field 4 · Digital Sograt Desert 4 |
| Lv 11 - 20 | Western Outskirts · Digital Geffen Field 10 · Digital Mt.Mjolnir 1 · Digital Payon Forest 6 |
| Lv 21 - 30 | Western Outskirts 2 · Digital Payon Forest 8 · Digital Undersea Tunnel F3 · Digital Mt.Mjolnir 10 |
| Lv 31 - 40 | Oil Refinery 3 · Oil Refinery 1 · Oil Refinery 2 · Ice Land 1 |
| Lv 41 - 50 | Ice Land 3 · Digital Glast Heim Churchyard · Digital West Orc Village · Digital Glast Heim Culvert F3 |
| Lv 51 - 60 | Wilderness Area · Digital Clock Tower F2 · Digital Glast Heim F1 · Digital Glast Heim Underprison F1 |
| Lv 61 - 70 | Ice Land 4 · Digital Glast Heim F2 · Digital Inside Glast Heim Chivalry F2 · Digital Nogg Road F2 |
| Lv 71 - 80 | Ice Land 5 · Digital Dimensional Gorge 22 · Digimon Maze Entrance |
| Lv 81 - 90 | Digimon Maze 3 · Digimon Maze 2 · Digimon Maze 1 · Server Continent 1 |
| Lv 91 - 99 | Digital Dimensional Gorge 21 · Server Continent 3 · Server Continent 2 |
Every map with its Digimon, levels, HP, EXP and the bosses: Digimon World: where to level.
Spots to leave for later
These popular dungeons are great with real gear, cards or a party, but a new player with pack gear loses more time dying and resting than hunting there. Come back when you are stronger:
| Spot | Why it's too hard with pack gear |
|---|---|
| Comodo Field 1 | Most of its monsters are Alligators (Lv 42, ~7,000 HP). Only a Mage can farm it before Lv 40. |
| Mjolnir Field 4 | Flora, Mantis and Argiope attack first and hit hard. Only the Hornets are easy, and they give little EXP. |
| Geffen Field 10 (Orc Village) | Orc Ladies dodge about half of a new melee character's hits and attack first. The Orc Lord MVP spawns here. |
| Byalan Dungeon 3, Payon Dungeon 3 | 4,000-5,000 HP monsters that attack first. OK for a Mage from Lv 35 and an Archer from Lv 45. Melee should wait for the second job. |
| Geffen Dungeon 2 | Nightmares are Ghost element: Neutral attacks do no damage to them, and every pack weapon and arrow is Neutral. Ghouls hit for 400+. |
| Einbroch Fields 1 and 4 | Geographers, Punks and Demon Pungus attack first and hit for 400-600. Punks dodge almost every melee hit. No Healer in Einbroch. |
| Glast Heim, Thanatos Tower, Magma, Juperos, Cursed Abbey | Endgame maps: 10,000-40,000 HP monsters that hit for 800-2,500. Go with a party and real gear. A Mage can try Magma Dungeon from Lv 70 using Cold Bolt. |
How long does it take?
Rough playing time for a solo player who follows the route with pack gear only, sitting down to heal instead of drinking potions and without Eden missions or a party:
| Class | Lv 1 → 30 | Lv 30 → 50 | Lv 50 → 70 |
|---|---|---|---|
| Archer | ~1 hour | ~7 hours | ~43 hours |
| Mage | ~1 hour | ~9 hours | ~49 hours |
| Thief | ~2 hours | ~8 hours | ~45 hours |
| Swordman | ~2 hours | ~9 hours | ~38 hours |
| Merchant | ~3 hours | ~21 hours | ~59 hours |
| Acolyte | ~4 hours | ~23 hours | ~76 hours |
Tips by class
| Class | How to level faster |
|---|---|
| Swordman | Learn Increase HP Recovery early: you rest much less. As a Knight, Two-Hand Quicken makes you attack a lot faster. |
| Thief | Max Double Attack first, then Improve Dodge. Put most points in AGI and STR. Daggers do less damage on large monsters, so hunt small and medium ones. |
| Merchant | The axe is slow, so add some AGI and DEX. Fight monsters that don't attack first. As a Blacksmith, Adrenaline Rush and Weaponry Research speed you up a lot. |
| Acolyte | Heal damages Undead (Payon Dungeon). Alone you are the slowest class, but a party values a healer and shares its EXP with you. |
| Archer | Learn Owl's Eye and Vulture's Eye, then use Double Strafe. Keep walking back while you shoot. Buy Fire Arrows (Tool Dealer in Alberta) for Earth monsters like Wolves and Hodes. |
| Mage | Max Fire Bolt first: most good early spots are Earth. Then Cold Bolt and Lightning Bolt. Use the bolt the monster is weak to, and sit to recover SP. |
Party leveling
- Set your party to Even Share EXP. Everyone in the party gets EXP from every kill.
- Even Share works when the highest and lowest level in the party are no more than 15 levels apart.
- When several players hit the same monster it gives 25% more EXP for each extra attacker, so fighting together is worth more than splitting up.
- A healer plus a damage dealer can go to the "Leave for later" dungeons much earlier than a solo player.
Don't die: the EXP penalty
Base level and Job level
- Novice: change to a first job at Job Level 10 with the Job Changer in Prontera (
147, 167). See Classes & Jobs. - First job: you can change to a second job from Job Level 40. Waiting until Job 50 gives you more skill points to spend.
- You must spend all your skill points before any job change.
- Base level makes you stronger (stats); Job level gives you skill points. Both go up from every kill.
- Exact EXP numbers for every level are in Leveling & EXP tables.
Questions
Monsters are too strong for me. Go back one spot in your route. If you sit down to heal after almost every fight, the spot is too hard for now.
I'm out of potions and zeny. Sell monster loot to any NPC shop, use the free Healer, sit down to recover HP, and claim your Milestone packs.
Why don't you list Glast Heim or Juperos? They are listed under Spots to leave for later. They are great maps, but not with beginner gear.
Can I level while I'm away? Only with the built-in Autoplay. Outside programs are not allowed and get accounts banned.